Cooking Tips > Baking > Advanced Baking > How do I make sourdough bread from scratch?

How do I make sourdough bread from scratch?

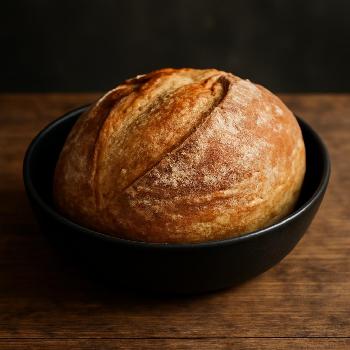
Learn how to bake your own sourdough bread from scratch with this comprehensive guide. We'll cover everything from creating a starter to shaping and baking the perfect loaf.

Part 1: Creating Your Sourdough Starter

The heart of sourdough bread is the starter, a living culture of wild yeasts and bacteria. Creating one takes time and patience, but it's worth the effort. Here's how to begin:

  1. Day 1: In a clean jar or container, combine 50g of whole wheat flour and 50g of unchlorinated water (bottled or filtered is best). Stir well until you have a thick paste.
  2. Day 2: Cover the jar loosely and let it sit at room temperature (ideally 70-75°F) for 24 hours. You might not see much activity yet.
  3. Day 3: Begin feeding your starter. Discard half of the starter (50g), then add 50g of unbleached all-purpose flour and 50g of unchlorinated water. Stir well.
  4. Day 4-7 (and beyond): Repeat the feeding process every 24 hours. You should start to see bubbles forming and the starter increasing in volume. This is a sign that the yeast is becoming active.
  5. When is it ready?: The starter is ready to use when it doubles in size within 4-8 hours after feeding, has a pleasant sour aroma (not moldy or off-putting), and has a bubbly, spongy texture. This may take 1-2 weeks, or longer depending on your environment.

Important Notes:

  • Use unbleached flour for feeding. Bleached flour can inhibit yeast growth.
  • Use unchlorinated water. Chlorine can kill the yeast and bacteria in your starter.
  • Keep your starter in a warm place. Temperature affects the activity of the yeast and bacteria.
  • Be patient! It takes time for a starter to develop.

Part 2: Making the Dough

Once your starter is active and bubbly, it's time to make the dough. This recipe uses a simple combination of flour, water, salt, and starter.

Ingredients:

  • 100g active sourdough starter
  • 350g unbleached all-purpose flour
  • 250g unchlorinated water
  • 8g salt

Instructions:

  1. Autolyse: In a large bowl, combine the flour and water. Mix until just combined and no dry flour remains. Cover and let rest for 30-60 minutes. This allows the flour to fully hydrate, resulting in a more extensible dough.
  2. Add Starter and Salt: Add the active starter and salt to the dough. Mix well, either by hand or with a stand mixer fitted with a dough hook. Mix for 5-7 minutes, or until the dough becomes smooth and elastic.
  3. Bulk Fermentation: Place the dough in a lightly oiled bowl, cover, and let it rise at room temperature for 4-6 hours. Perform stretch and folds every 30-60 minutes during the first 2-3 hours. This helps to develop strength in the dough.

Part 3: Shaping and Proofing

After the bulk fermentation, it's time to shape the dough and proof it. Proofing is the final rise before baking.

Instructions:

  1. Shape the Dough: Gently turn the dough out onto a lightly floured surface. Shape it into a round or oval loaf. Be careful not to deflate the dough too much.
  2. Proofing: Place the shaped dough in a well-floured banneton basket (or a bowl lined with a floured cloth). Cover and refrigerate for 12-24 hours. This cold proof develops flavor and makes the dough easier to score.

Part 4: Baking the Bread

Now for the exciting part – baking! Baking in a Dutch oven is the easiest way to get a beautiful, crusty loaf.

Instructions:

  1. Preheat: Preheat your oven to 450°F (232°C) with a Dutch oven inside for at least 30 minutes. The Dutch oven needs to be very hot.
  2. Score: Carefully remove the Dutch oven from the oven. Take the dough out from the refrigerator and gently invert the dough into the hot Dutch oven. Use a sharp knife or lame to score the top of the loaf. Scoring allows the bread to expand during baking and prevents it from cracking randomly.
  3. Bake: Cover the Dutch oven and bake for 20 minutes. Then, remove the lid and bake for another 25-30 minutes, or until the crust is deep golden brown and the internal temperature reaches 200-210°F (93-99°C).
  4. Cool: Carefully remove the bread from the Dutch oven and let it cool completely on a wire rack before slicing and enjoying.

FAQ

  • Why is my sourdough starter not rising?

    Several factors can cause a starter not to rise, including: incorrect temperature, using chlorinated water, using bleached flour, or simply not giving it enough time. Ensure you're using unbleached flour and unchlorinated water, keeping the starter in a warm place (70-75°F), and feeding it regularly. It can take a week or two for a starter to become active.
  • Why is my sourdough bread dense and gummy?

    Dense and gummy sourdough can be caused by under-proofing, using a weak starter, or not baking it long enough. Make sure your starter is active and doubles in size after feeding before using it. Allow the dough to proof properly, and bake the bread until the internal temperature reaches 200-210°F (93-99°C).
  • What is the best flour to use for sourdough bread?

    Unbleached all-purpose flour is a good starting point. You can also use bread flour, which has a higher protein content and will result in a chewier crumb. Some bakers also like to incorporate whole wheat or rye flour for added flavor and texture.
  • Can I use a stand mixer to make sourdough dough?

    Yes, you can use a stand mixer with a dough hook to make sourdough dough. Mix on low speed until the ingredients are combined, then increase the speed to medium and mix for 5-7 minutes, or until the dough becomes smooth and elastic.
  • How do I store sourdough bread?

    Sourdough bread is best stored in a bread box or wrapped in a linen cloth at room temperature. This will help to keep the crust crisp. Avoid storing it in the refrigerator, as this will dry it out. You can also freeze sourdough bread for longer storage. Slice it before freezing for easy thawing.