Baking & Pastry > Basic Baking Principles > Mixing Methods > Kneading (Bread Dough Development)
The Windowpane Test for Perfect Bread Dough
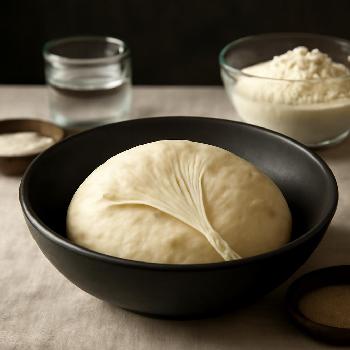
Learn the crucial technique of kneading to develop gluten and create a strong, elastic dough for exceptional bread. This recipe focuses on hand-kneading and achieving the ideal dough texture using the windowpane test.
Ingredients
- 500 g Bread Flour
- 325 ml Water
- 7 g Instant Dry Yeast
- 10 g Salt
Preparing the Dough
In a large bowl, combine the bread flour and instant dry yeast. Add the water and mix until a shaggy dough forms. Let it rest for 20 minutes (autolyse). This allows the flour to fully hydrate and develop flavor.
Adding Salt and Initial Mixing
Add the salt to the dough and mix thoroughly. The dough will be sticky at this stage. Don't worry, it will become more manageable as you knead.
Kneading the Dough
Turn the dough out onto a lightly floured surface. Begin kneading by pushing the dough away from you with the heel of your hand, then folding it back over itself. Rotate the dough 90 degrees and repeat. Continue kneading for 10-15 minutes.
Understanding Kneading Techniques
Kneading develops the gluten in the flour, which gives bread its structure and elasticity. As you knead, the dough will become smoother and more elastic. If the dough sticks excessively, add a very small amount of flour to your work surface. Avoid adding too much flour, as this can make the bread dry.
The Windowpane Test
After 10-15 minutes of kneading, perform the windowpane test. Pinch off a small piece of dough and gently stretch it between your fingers. If the dough stretches thinly enough that you can see light through it without tearing, it has developed sufficient gluten. If it tears easily, continue kneading for another few minutes and test again.
First Proofing
Place the kneaded dough in a lightly oiled bowl, turning to coat. Cover with plastic wrap or a damp cloth and let rise in a warm place for 1-1.5 hours, or until doubled in size.
Shaping and Second Proofing
After the first proofing, gently deflate the dough and shape it into your desired form (e.g., a boule or a loaf). Place the shaped dough in a prepared baking pan or on a baking sheet. Cover and let rise again for 30-60 minutes, or until nearly doubled.
Baking
Preheat your oven to the required temperature for your chosen bread recipe. Bake the bread until golden brown and cooked through. A good indication of doneness is when the internal temperature reaches 200-210°F (93-99°C).
FAQ
-
Why is kneading important?
Kneading develops the gluten in the flour, which gives bread its structure, elasticity, and chewiness. Without proper kneading, bread will be dense and lack proper rise. -
How do I know if I've kneaded the dough enough?
The windowpane test is the best way to determine if the dough has been kneaded sufficiently. It should stretch thinly enough to see light through it without tearing. -
Can I use a stand mixer for kneading?
Yes, a stand mixer with a dough hook can be used. Knead on low speed for about 8-10 minutes, or until the dough passes the windowpane test. -
What if my dough is too sticky?
Add a very small amount of flour to your work surface, but avoid adding too much, as this can make the bread dry. A bench scraper can be helpful for managing sticky dough.