Baking & Pastry > Decorating & Finishing > Cookie Decorating > Working with Royal Icing (Flooding & Outlining)
Elevate Your Cookie Decorating: Wet-on-Wet and Marbling
Take your royal icing skills to the next level with wet-on-wet and marbling techniques. This guide explores how to create stunning designs on cookies using these advanced methods. Learn how to achieve intricate patterns and beautiful effects with royal icing, adding a touch of elegance and artistry to your baked creations. From basic swirls to complex designs, master the art of wet-on-wet and marbling.
Ingredients
- As needed Royal Icing (Flooding Consistency)
- As needed Gel Food Coloring
- As needed Squeeze Bottles or Piping Bags
- 1 Toothpick or Scribe Tool
Preparing the Icing
Prepare royal icing in flooding consistency as described in the previous recipe. Divide the icing into separate bowls and color each bowl with different gel food colorings. Place each color into a squeeze bottle or piping bag for easy application.
Wet-on-Wet Technique
Flood the entire cookie with one color of royal icing. While the base icing is still wet (hence, 'wet-on-wet'), immediately pipe dots, lines, swirls, or other designs using different colored royal icing on top of the wet base. The colors will blend and create unique patterns.
Use a toothpick or scribe tool to drag the colors through each other to create even more intricate designs. For example, drag a toothpick through a row of dots to create a heart or feather pattern.
Experiment with different colors and designs to achieve your desired effect. Popular wet-on-wet designs include polka dots, hearts, flowers, and abstract patterns.
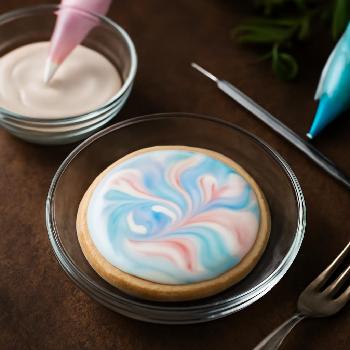
Marbling Technique
Flood the cookie with one color of royal icing. While the base icing is still wet, pipe lines or dots of different colored icing across the surface of the cookie.
Using a toothpick or scribe tool, drag the tip through the lines of icing in one direction to create a marbled effect. Avoid over-mixing, as this can muddy the colors.
Experiment with different color combinations and dragging techniques to create unique marbled patterns. Try swirling the colors together for a more organic look.
Drying and Finishing
Allow the decorated cookies to dry completely, uncovered, at room temperature. This usually takes 6-8 hours or overnight. Once dry, the cookies can be stored in an airtight container at room temperature for up to a week.
FAQ
-
What is the key to successful wet-on-wet designs?
The key is to work quickly and pipe the designs onto the wet base icing before it starts to crust over. If the base icing dries too much, the colors won't blend properly. -
Can I use different icing consistencies for wet-on-wet?
It's best to use the same flooding consistency for both the base and the designs to ensure consistent blending. Slightly thicker icing can be used for more defined dots or lines, but it might not blend as seamlessly. -
How do I prevent the colors from bleeding into each other too much?
Avoid over-mixing or dragging the colors too much. Work with a light touch and use a clean toothpick or scribe tool for each drag to prevent color contamination. -
Can I add luster dust or sprinkles to wet-on-wet or marbled cookies?
Yes, but add them while the icing is still wet so they adhere properly. Luster dust can add a shimmer and elegance to your designs.