Baking & Pastry > Decorating & Finishing > Cake Decorating Basics > Frosting a Cake Smoothly
Achieving Perfectly Smooth Buttercream Frosting
A step-by-step guide to frosting a cake with buttercream for a flawless, professional-looking finish. Learn the secrets to smooth buttercream, proper cake preparation, and expert frosting techniques.
Ingredients
- 4-6 cups Buttercream Frosting
- 2-3 layers Cake Layers (cooled)
- 1/2 cup Simple Syrup (optional)
- 1 Offset Spatula
- 1 Cake Scraper or Bench Scraper
- 1 Turntable
- 1 Piping Bag and Round Tip (optional)
Prepare the Buttercream
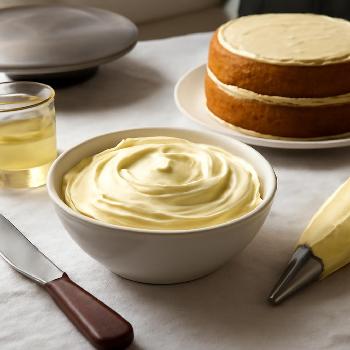
Begin with a high-quality buttercream frosting that's smooth and easy to work with. Make sure it's at room temperature for optimal spreading consistency. If your buttercream is too stiff, beat it on low speed for a few minutes to soften it. If it's too soft, chill it briefly in the refrigerator.
Level and Prepare Cake Layers
Ensure your cake layers are level by trimming any domes with a serrated knife. This will provide a stable base for frosting and prevent unevenness. If desired, brush each layer with simple syrup for added moisture.
Apply a Crumb Coat
Place one cake layer on a turntable or cake stand. Spread a thin layer of buttercream over the top. This is your crumb coat, which seals in any loose crumbs. Repeat with subsequent layers, stacking them evenly with buttercream between each. Once the cake is stacked, apply a thin layer of buttercream to the entire cake exterior, covering all surfaces. Chill the crumb-coated cake in the refrigerator for 30 minutes to allow the buttercream to firm up.
Apply the Final Frosting Layer
After the crumb coat has chilled, remove the cake from the refrigerator. Apply a generous amount of buttercream to the top and sides of the cake. Use an offset spatula to spread the frosting evenly, creating a smooth, uniform layer. Don't worry about perfection at this stage; the goal is to apply enough frosting for smoothing.
Smooth the Frosting with a Scraper
Hold a cake scraper or bench scraper against the side of the cake at a 45-degree angle. While holding the scraper steady, rotate the turntable. This will remove excess frosting and create a smooth surface. Repeat this process several times, wiping the scraper clean between each pass. For the top surface, use the offset spatula to smooth the frosting from the center outwards. You can use the turntable again to help with this. If you have air pockets, use the tip of your offset spatula to gently pop them and then smooth over the area.
Achieving Sharp Edges (Optional)
For sharp edges, chill the frosted cake in the freezer for about 15-20 minutes until the buttercream is firm but not frozen solid. Use a hot, dry offset spatula to carefully smooth and define the top edges of the cake. Wipe the spatula clean after each pass.
Final Touches
Once the frosting is smooth, you can add any desired decorations. Consider piping borders, adding sprinkles, or arranging fresh fruit. Chill the finished cake in the refrigerator for at least 30 minutes before serving to allow the frosting to set completely.
FAQ
-
Why is my buttercream not smooth?
Several factors can contribute to unsmooth buttercream. Make sure your buttercream is at the right consistency (not too stiff or too soft). Air bubbles can also cause bumps; try beating your buttercream on low speed to release them. The crumb coat is also very important to seal in any crumbs. -
How do I prevent air bubbles in my frosting?
Beat the buttercream on low speed for a few minutes before frosting the cake to release air bubbles. When frosting, avoid lifting the spatula too much, as this can introduce air. -
Can I use a different type of frosting?
While this guide focuses on buttercream, the same principles apply to other frostings like ganache or cream cheese frosting. However, you may need to adjust the techniques slightly based on the specific frosting.