Baking & Pastry > Pastries (Laminated Dough) > Danish Pastry > Basic Danish Dough Recipe
Classic Danish Pastry Dough
This recipe provides a foundation for creating delectable Danish pastries at home. It focuses on a balance of rich flavors and a light, flaky texture achieved through the lamination process.
Ingredients
- 500 g All-purpose flour
- 7 g Instant dry yeast
- 60 g Granulated sugar
- 8 g Salt
- 240 ml Whole milk, cold
- 1 Large egg
- 30 g Unsalted butter, cold
- 250 g Unsalted butter, for lamination
Making the Dough
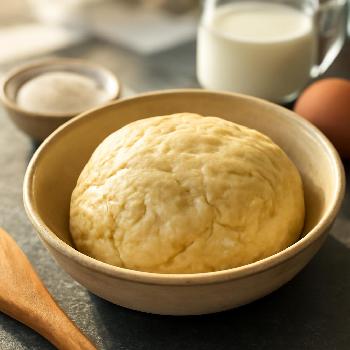
In a large bowl, whisk together the flour, yeast, sugar, and salt. Add the cold milk, egg, and the 30g of cold butter (cut into small pieces). Mix until a shaggy dough forms. Turn the dough out onto a lightly floured surface and knead for 5-7 minutes, until smooth and elastic. The dough should be slightly tacky but not sticky.
First Rise & Chill
Shape the dough into a ball, place it in a lightly oiled bowl, turning to coat. Cover with plastic wrap and let rise in a warm place for 1 hour, or until doubled in size. Punch down the dough, flatten it into a rectangle, wrap tightly in plastic wrap, and refrigerate for at least 2 hours, or preferably overnight. This chilling time is crucial for developing the gluten and preventing the butter from melting during lamination.
Preparing the Butter Block
While the dough is chilling, prepare the butter block. Place the 250g of cold butter between two sheets of parchment paper. Using a rolling pin, pound and roll the butter into a 6x8 inch rectangle. The butter should be cold but pliable. Refrigerate the butter block until ready to use.
Lamination: First Fold
On a lightly floured surface, roll out the chilled dough into a 12x16 inch rectangle. Place the cold butter block in the center of the dough rectangle. Fold one side of the dough over the butter, and then fold the other side over, creating a three-layer sandwich. Press the edges to seal. This is your first single fold.
Lamination: Second Fold
Rotate the dough 90 degrees so that the folded edge is on your right. Roll the dough out again into a 12x16 inch rectangle. Fold the dough in thirds again, like a letter. This is your second single fold. Wrap the dough tightly in plastic wrap and refrigerate for at least 1 hour.
Lamination: Third Fold
Repeat the rolling and folding process one more time, creating a third single fold. Wrap the dough tightly in plastic wrap and refrigerate for at least 1 hour, or preferably longer.
Shaping & Baking
After the final chill, the dough is ready to be shaped into your desired Danish pastries. Roll out the dough to about 1/4 inch thickness and cut into shapes. Add fillings like fruit preserves, cream cheese filling, or almond paste. Proof the shaped pastries for 30-45 minutes, or until slightly puffy. Preheat oven to 375°F (190°C). Brush the pastries with an egg wash (1 egg beaten with 1 tablespoon of milk) and bake for 15-20 minutes, or until golden brown.
Cooling & Glazing (Optional)
Let the pastries cool slightly on a wire rack. You can glaze them with a simple icing made from powdered sugar and milk, or a fruit glaze.
FAQ
-
Why is the butter leaking out during lamination?
The butter is likely too warm. Make sure the butter and the dough are well-chilled throughout the lamination process. You can refrigerate the dough for 15-20 minutes between folds if the butter starts to soften too much. -
Can I use salted butter?
While you can, unsalted butter is recommended for better control over the salt content in the pastry. If using salted butter, reduce the amount of salt added to the dough. -
How can I tell if the dough is properly proofed?
The pastries should be slightly puffy and feel light to the touch. If they are still dense, they need more time to proof. Be careful not to over-proof, as they may collapse during baking. -
Can I freeze the Danish dough?
Yes, you can freeze the dough after the lamination process is complete. Wrap it tightly in plastic wrap and then in aluminum foil. Thaw it overnight in the refrigerator before shaping and baking.