Baking & Pastry > Decorating & Finishing > Cake Decorating Basics > Using Piping Bags and Tips (Basic)
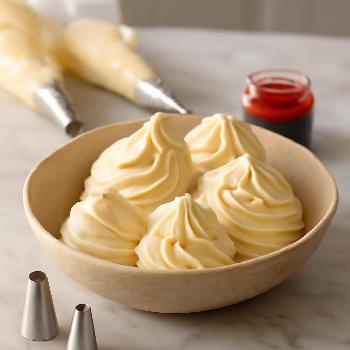
Piping Perfection: Mastering Basic Techniques
Learn the fundamentals of using piping bags and tips to create beautiful cake decorations. This guide covers filling a piping bag, basic piping techniques, and essential tips for achieving professional-looking results.
Ingredients
- 2 cups Buttercream Frosting
- 3 Piping Bags
- 1 each Piping Tips (Round, Star, Leaf)
- as needed Gel Food Coloring (optional)
Preparing the Piping Bag
1. Selecting the Right Tip: Choose the piping tip that matches your desired decoration. For simple borders and writing, a round tip is ideal. For stars and rosettes, use a star tip. For leaves, use a leaf tip. 2. Preparing the Bag: Cut the tip off the piping bag, ensuring the tip can securely fit without falling through. It's better to cut a small opening and enlarge it if needed. 3. Securing the Tip (Optional): For added security, use a coupler. Place the coupler base inside the bag, push it through the opening, and then attach the tip using the coupler ring.
Filling the Piping Bag
1. Folding Over the Bag: Fold the top of the piping bag down to create a cuff. This prevents frosting from getting on your hands and keeps the bag clean. 2. Spooning in the Frosting: Use a spatula or spoon to fill the bag with buttercream. Don't overfill the bag, as it will be difficult to control. About halfway full is usually a good amount. 3. Closing the Bag: Twist the top of the bag tightly to close it, pushing the frosting down towards the tip. Ensure there are no air pockets.
Practicing Basic Piping Techniques
1. Pressure Control: Practice applying even pressure to the bag to create consistent lines and shapes. Squeeze from the top of the bag, using your non-dominant hand to guide the tip. 2. Straight Lines: Hold the piping bag at a 45-degree angle to the surface and apply steady pressure while moving the tip in a straight line. 3. Dots and Rosettes: For dots, apply pressure and then release. For rosettes, apply pressure and swirl the tip in a circular motion before releasing. 4. Stars: With a star tip, hold the tip at a 90-degree angle to the surface and apply consistent pressure to create star shapes. 5. Leaves: Hold the leaf tip at a 45-degree angle with the pointed end facing up. Apply pressure and gently pull the tip forward to create a leaf shape.
Tips for Success
1. Practice Makes Perfect: Practice on a piece of parchment paper before decorating your cake. This will help you get a feel for the pressure and movement required for each technique. 2. Smooth Frosting: Make sure your buttercream is smooth and free of air bubbles before filling the bag. 3. Keep Frosting Cool: If the frosting becomes too warm, it will be difficult to work with. If this happens, refrigerate the bag for a few minutes. 4. Clean Tips: Keep your piping tips clean to prevent clogs. Wipe them with a damp cloth or paper towel as needed.
FAQ
-
How do I prevent air bubbles in my piping bag?
After filling the bag, gently squeeze the frosting down towards the tip to release any trapped air. Twist the top of the bag tightly to prevent more air from entering. -
What do I do if my frosting is too stiff?
Add a small amount of milk or water, one teaspoon at a time, until the frosting reaches the desired consistency. Mix well after each addition. -
How do I clean my piping tips?
Wash the tips with warm, soapy water. Use a small brush to remove any stubborn frosting. Make sure the tips are completely dry before storing them.