Soups & Stews > Soup Making Techniques > Simmering vs. Boiling > Reducing Liquids in Soups & Stews
The Art of Liquid Reduction in Soups and Stews
Learn how to effectively reduce liquids in your soups and stews to concentrate flavors and achieve the perfect consistency. This guide covers the key techniques and principles behind liquid reduction, ensuring delicious results every time.

Understanding the Goal: Flavor Concentration and Texture
The primary reason to reduce liquids in soups and stews is to concentrate the flavors. As water evaporates, the remaining solids – salts, sugars, acids, and other flavor compounds – become more concentrated, resulting in a richer, more intense taste. Reducing also thickens the liquid, creating a desirable texture, particularly in stews and creamy soups.
The Simmering Approach
Simmering is the ideal method for reducing liquids in most soups and stews. It allows for gentle evaporation without excessive agitation. A gentle simmer ensures that delicate ingredients don't break down and that the flavors meld harmoniously. Maintain a low heat with small bubbles occasionally rising to the surface.
The Boiling Approach (Use with Caution)
Boiling, while faster, is generally not recommended for reducing liquids in soups and stews. Rapid boiling can cause ingredients to overcook, toughen, or fall apart. It can also result in uneven reduction, with some areas becoming too thick while others remain watery. However, for certain broths, a brief boil at the end of the cooking process may be used to further concentrate flavor if no delicate ingredients are present.
Techniques for Effective Reduction
To promote even reduction, use a wide, shallow pot. This maximizes the surface area exposed to the air. Leave the pot partially uncovered to allow steam to escape. Stir occasionally to prevent sticking and ensure even heat distribution. Monitor the liquid level and consistency closely, adjusting the heat as needed. Use a wooden spoon to scrape any fond stuck on the sides of the pot into the liquid.
Recognizing the Right Consistency
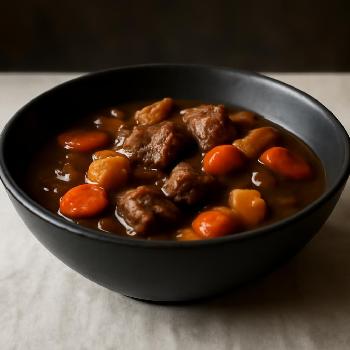
The ideal consistency depends on the type of soup or stew. For a light broth, you might only need a slight reduction to concentrate the flavors. For a hearty stew, you might want a thicker, more gravy-like consistency. To test the consistency, dip a spoon into the liquid and run your finger across the back of the spoon. If the liquid leaves a clean line, the stew is thick enough. If the liquid runs back together immediately, it needs more reduction.
Nutrition Facts Estimated per 100g of product
The nutritional content will vary widely based on the specific ingredients in your soup or stew. Reduction will slightly increase the concentration of nutrients per serving.
Other Considerations for Nutrition
Be mindful of sodium content when reducing liquids, as the salt concentration will increase. Adjust seasonings accordingly. Also consider how certain vitamins may be affected by prolonged heat, mainly Vitamin C which is sensitive to heat.
FAQ
-
How do I prevent my soup from becoming too salty when reducing?
Add salt gradually throughout the cooking process, tasting as you go. It's better to undersalt at the beginning and then adjust at the end, after the liquid has been reduced. If the soup becomes too salty, you can add a small amount of water or a starchy ingredient like potatoes to absorb some of the salt. -
What if I accidentally reduce the liquid too much?
Add water, broth, or stock a little at a time, stirring until you reach the desired consistency. Taste and adjust the seasonings as needed. -
Can I reduce liquids in a slow cooker?
While you can't significantly reduce liquids in a slow cooker due to the trapped steam, you can transfer the soup or stew to a stovetop pot after slow cooking and then reduce it over medium heat. Ensure the soup is brought to a simmer before beginning the reduction process.
